Keep in mind that I had my sewingmachine for about a week when I came up with these, so I mean it when I say they're easy to make.

The materials you'll need:
- 4 even sized squares, anything between 5 and 10 cm would be perfect.
- 1 square that's the same size as the 4 little ones combined.
- material to use as stuffing.
- embroidery floss.
- a button.

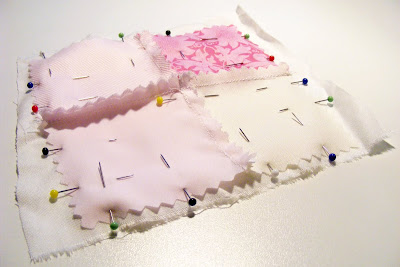
Step 1: Take 2 of the little squares, place them on top of each other with the good sides of the fabrics facing each other and pin them in place. Sew one of the sides while allowing yourself a 0.5 cm allowance and make sure to go over the beginning and end a couple of times to secure the stitches. Repeat this step with the other 2 squares.


Step 2: Now that you've got 2 pieces made of 2 squares each, place them on top of each other, once again with the good sides of your fabrics facing each other. Line the pieces up using the middle seams and pin them together.


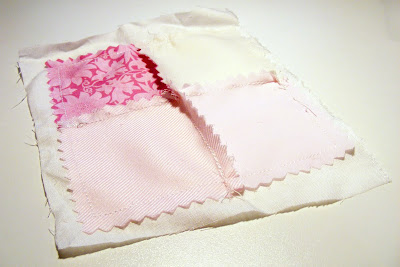
Step 3: Sew the 2 part together allowing yourself a 0.5 cm allowance once more to make a perect square. Fold it open and check if the middle's klined up correctly. If it's not this will be the only chance you'll have left of fixing it.


Step 4: Turn your square upside down and pin it onto your larger fabric square. Sew them together, but make sure to leave a 2.5 cm opening in the middle of one of the smaller squares. You'll be needing this to invert the pincushion. You can place the opening at one of the corners, but it can make the handstitching a lot harder.


Step 5: Cut off the corners, getting as close to the stitching as you can without actually cutting it and invert the pincushion. If you're having trouble turning it try using a pair of tweezers or the back of a pencil.


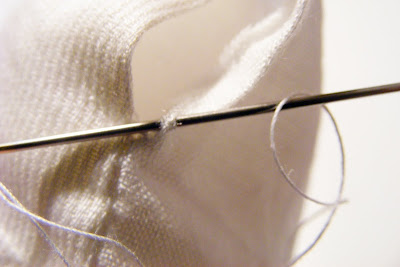
Step 6: Get as much filling into your pincushion as you can without ripping the seems and make sure that the seam allowance of the turning gap is neatly folded to the inside and underneath the filling. Thread your needle with a piece of strong, folded thread and make sure that the looped part's longer than the part with the 2 end. Make your first stitch on one side of the gap, right into the fold, and make is as tiny as possible. Pull the needle through the loop. This will secure the thread without having to make a knot.


Step 7: Make your second stitch right into the seam of the gap on the opposite side, starting right across the exit point of your first stitch. Keep stitching like that, going back and forth, making sure that the stiching are as small as possible and neatly lined up. The stitches will look like the steps of a ladder.


Step 8: Go on stitching until the gap's completely closed and close the stitches by pulling the thread in short, little tugs. Tie a knot the size of your needle as close to the fabric as you can. Stitch right through the pincushion and give the thread a short pull to sink the knot into the pincushion.


Step 9: Get your embroidery floss and wrap it around your pincushion 5 times. Thread your needle and pull it through the middle of the pincushion, front to back, making sure there's about half a wrap of floss left. Try to get your needle out in the middle.


Step 10: Pull the needle through the pincushion a second time, once again font to back, and pull it tight, placing the embroidery floss right on one of the seams of your squares. Try to keep the needle coming out the back in the same spot. Keep going on like that 6 more times so that all, but one, of the seams have 2 strands of floss.


Step 11: Tread your button onto the thread and place the needle a couple of mm across the middle, on the opposite seam of the one where your floss is going to be. Pull it through. Remove the thread from your needle and go back to the front, to the piece of left-over thread you started with. Thread your needle with it and pull it through the button, in opposite direction of the previous thread. Pull your needle through the pincushion for the last time, again making sure that you go across the middle like the previous stitch.


Step 12: Pull on the 2 ends of floss coming out at the back, pulling the button into place. Tie them off and voilà, you're done :D


I'd love to see pictures of all of your pincushions :D And as a bonus I'll be giving away the pincushion I made in this tutorial. Just leave a message with 'win' in it and I'll have my doggy pick a winner wednesday the 16th.
Your free to do with this tutorial whatever you please, just don't copy it and claim the whole thing as your own please.
Comments are loved!
1 comment:
Very nice job and wonderful pictures. I made one pincusion prior to your tutorial, but used emery to stuff it. Unfortunately, the emery slowly leaks thru the buttonhole stitching. The pincusion is now kept on a coaster.
So now I've learned, and learned to use embroidery floss. Thank you.
Post a Comment